e-Smart Programming
Open the original PDF document
View PDFTownSteel e-Smart 2000 Series Programming Guide
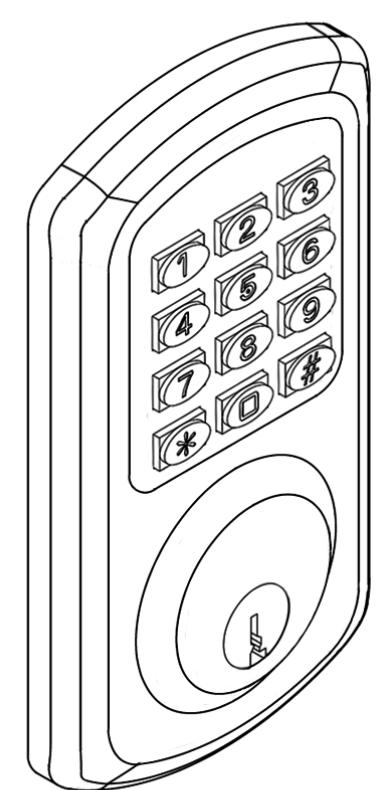
<u>Index</u>
| Definitions | |
|---|---|
| Factory Default Settings | 3 |
| Important Notes ····· | |
| Handing Information | |
| Change Master Code····· | 4 |
| Add Codes····· | 5 |
| Add a User Code | |
| Add Multiple User Codes | |
| Add Service Code | |
| Delete Codes ····· | 6 |
| Delete User Code | |
| Delete Service Code | |
| Delete All Service Codes | |
| Disable Codes ····· | |
| Disable all Codes ····· | |
| Sound ····· | |
| Lock Status Indicator | |
| Identify User ID | |
| Next Free User ID | |
| Penalty Time ····· | |
| Reset Lock to Factory Default Settings | 10 |
| Low Battery | 11 |
Definitions
- Code Length: Length of Master Code defines the length of all other codes. Length of codes can be 4, 5, or 6 digits. Master Code and User Codes must be the same length.
- LED Indicator: LED indicators are located at the top outside of the lock. Lock flashes green LED and/or red LED dependent on inputs.
- Master Code: Code used to program the lock and unlock the lock. Factory Default Settings Master Code is 12345 - this must be changed before programming the lock. Each lock has only one Master Code. Multiple locks can have same Master Code.
- User ID: Two-digit identification numbers for User Codes. Each User Code must have a User ID (00-99).
- User Code: Codes used to unlock the lock. User Codes are programmed by Master Code. Lock can have a maximum of 100 User Codes. Program 02 programs User IDs and their User Codes.
- Service Code (One-time User Code): Code that allows one entry per code. Service Code is deleted after it has been used. Lock can have a maximum of 5 Service Codes active simultaneously.
- Sound: Keypad sound is enabled by Factory Default Settings. Disabling the sound does not affect general operation and programming of the lock. Program 73 disables sound and Program 71 enables Sound.
- Lock Status Indicator: LED indicator on lock to show whether it is locked (flashing red LED) or unlocked (flashing green LED). Program 91 enables or disables the lock status indicator.
- Penalty Time (Keypad Anti-Tamper Lockout Time): Period that a lock stays in locked position after it reached its max number of incorrect code entries. During Penalty Time, no other codes will be accepted. Factory Default Settings Penalty Time is 60 seconds after 3 invalid tries. Program 92 adjusts Penalty Time from 0 (disabled) to 90 seconds after 0 (disabled) to 9 tries. This is used to prevent unauthorized entry.
Factory Default Settings
Master Code: 12345 Sound: Enabled
Lock Status Indicator: Disabled
Penalty Time (Keypad Anti-Tamper Lockout Time): 60 seconds after 3 invalid code entries
Important Notes
- Factory Default Settings Master Code must be changed before programming any other codes.
- Manufacturer assumes no liability, direct or indirect, due to failure to change Master Code.
- Pressing the Star (✴) key will cancel any on-going program sequence or code input.
- Pressing the Pound (#) key starts programming.
- Programming can be done only if the lock is locked.
- Replacing batteries does not change existing settings.
-
During programming, green LED indicator indicates success and the red LED indicator indicates failure.
- o One green LED flash and 2 short beeps occurs after each program sequence. (●)
- o Two green LED flashes and 2 beeps (one short beep and one long beep) occurs at the end of each successful program sequence (●●).
- o One red LED flash and 1 long beep indicates failure program sequence.
- The red LED will flash 0.5 second (with one long beep) after an invalid code is entered.
- It is important to maintain track of user ID's and Codes used in the system to use certain features.
Disclaimer - The Codes used in the following examples are not recommended for actual valid codes. Acceptable protocol should be followed for secure codes. Repeated strings of numbers are not secure.
Handing Information
Handing must be set before programming lockset. No programming options will be available until handing is set.
Steps
- 1. Confirm lockset is in locked position, meaning deadbolt is extended.
- 2. Confirm handing indicator on battery tray is in correct position RH (Right Hand) or LH (Left Hand).
- 3. Confirm lock spindle is in correct position Horizontal Position for RH or Vertical Position for LH.
- 4. Input the Factory Default Settings Master Code 12345.
After entering the Factory Default Settings Master Code, deadbolt will retract then extend again. This means lockset handing is set.
If handing does not set, see Steps 1-3, then see Reset Lock without Master Code on page 10. Finally, see Step 4.
Change Master Code
Key Sequence
[#] [Master Code] ● [01] ● [1-digit Code length] ● [New Master Code] ● [New Master Code] ●●
- For example , to change Master Code to "5555", Press: [#] [12345] [01] [4] [5555] [5555] ●●
- The length of the Master Code defines the length of all other codes. It cannot be changed to other lengths unless factory default settings are restored.
Add Codes
Add a User Code
Key Sequence
[#] [Master Code] ● [02] ● [2-digit User ID] ● [New User Code] ●●
For example , to add User Code of "2010" with User ID 01, Press: [#] [5555] ● [02] ● [01] ● [2010] ●●
Add Multiple User Codes
Key Sequence
[#] [Master Code] ● [02] ● [2-digit User ID] ● [New User Code] ●● [Second 2-digit User ID] ● [Second New User Code] ●● … And so forth
- For example , to add User Codes "2020", "2030" and "2040" with User ID 10, 11, and 12 respectively, Press: [#] [5555] ● [02] ● [10] ● [2020] ●● [11] ● [2030] ●● [12] ● [2040] ●●
- Input of additional User Code must start before the green LED indicator stops flashing (8 Seconds), otherwise start process from beginning.
Add a Service Code
Key Sequence
[#] [Master Code] ● [2] [1-digit Service Code ID] ● [Enter Service Code] ●●
- For example , to add Service Code 1 "9999", Press [#] [5555] [2] [1] [9999] ●●
- Up to 5 Service Codes can be programmed. Use Service Codes ID's 1, 2, 3, 4, or 5.
Delete Codes
Delete a Code
Key Sequence
[#] [Master Code] ● [03] ● [2-digit User ID] ●●
For example , to delete User Code "2040" with User ID "04", Press: [#] [5555] ● [03] ● [04] ●●
Delete a Service Code
Key Sequence
[#] [Master Code] ● [3] [1-digit Service Code ID] ●●
For example , to delete Service Code 1, Press [#] [5555] ● [3] [1] ●●
Delete All Service Codes
Key Sequence
[#] [Master Code] ● [30] ● [30] ●●
For example , to delete all Service Codes, Press [#] [5555] ● [30] ● [30] ●●
Disable a Code
Disable a User Code
Key Sequence
[#] [Master Code] ● [04] ● [2-digit User ID] ●●
For example , to disable User Code "2030" with User ID "03", Press [#] [5555] ● [04] ● [03] ●●
Enable a User Code
Key Sequence
[#] [Master Code] ● [05] ● [2-digit User ID] ●●
For example , to enable User Code "2030" with User ID "03", Press [#] [5555] ● [05] ● [03] ●●
Disable all User Codes
Disable all User Codes
Key Sequence
[#] [Master Code] ● [06] ●●
- For example , to disable all User Codes, Press [#] [5555] [06] ●●
- All User Codes are disabled, and Service Codes are deleted.
Enable all User Codes
Key Sequence
[#] [Master Code] ● [08] ●●
- For example, to enable all User Codes, Press [#] [5555] [08] ●●
- All User Codes are enabled, and Service Codes must be re-programmed.
- If Codes are disabled using Program 06 and a new User Code is subsequently added (or an existing Code changed), the new (or changed) User Code will automatically become enabled.
Sound
Disable Keypad Sound – Sound Off
Key Sequence
[#] [Master Code] ● [73] ●●
Enable Keypad Sound – Sound On
Key Sequence
[#] [Master Code] ● [71] ●●
Lock Status Indicator
Enable Lock Status Indicator – Status Locked (Red LED)
Key Sequence
[#] [Master Code] ● [91] ● [2] ●●
Enable Lock Status Indicator – Status Unlocked (Green LED)
Key Sequence
[#] [Master Code] ● [91] ● [3] ●●
Red LED flashes when door is locked; Green Led flashes when door is unlocked or in Passage Mode
Disable Lock Status Indicator – No Flashing LED Indicator
Key Sequence
[#] [Master Code] ● [91] ● [1] ●●
Identify User ID
Key Sequence
[#] [Master Code] ● [09] ● [Enter Code to be located] ●●
If the code entered is recognized, the following sequence will occur:
- At the start of the Code Location Function, the lock will flash both the green and red LEDs and emit 2 beeps.
- The lock will identify the first digit by flashing the green LED and beeping 0 9 times.
- To signify the end of the first digit sequence, the lock will flash both the green and red LEDs and will emit 2 beeps.
- The lock will identify the second digit by flashing the green LED and beeping 0 9 times.
- To signify the end of the second digit sequence, the lock will flash both the green and red LEDs and will emit 2 beeps.
Should the code not be recognized, the lock will sound one long beep (0.5 sec) with a red LED.
Next Free User ID
Key Sequence
[#] [Master Code] ● [10] ●●
If a next free user ID is recognized, the following sequence will occur:
- At the start of the Next Free User Code Location function, the lock will flash both the green and red LEDs and will emit 2 beeps.
- The lock will identify the first digit by flashing the green LED and beeping 0 -9 times.
- To signify the end of the first digit sequence, the lock will flash both the green and red LEDs and will emit 2 beeps.
- The lock will identify the second digit by flashing the green LED and beeping 0 -9 times.
- To signify the end of the Next Free User Code, the lock will flash both the green and red LEDs and will emit 2 beeps. If no free address is found, then the lock will emit one long beep (0.5 sec) with a red LED.
Should a Free User Code ID not be found, the lock will sound one long beep (0.5 sec) with a red LED.
Penalty Time (Keypad Anti-Tamper Lockout Time)
Adjust Penalty Time
Key Sequence
[#] [Master Code] ● [92] ● [1-digit invalid codes entry] ● [1-digit X0 seconds] ●●
For example, to adjust Penalty Time for 70 seconds after 5 invalid entries, press [#] [5555] ● [92] ● [5] ● [7] ●●
Disable Penalty Time
Key Sequence
[#] [Master Code] ● [92] ● [0] ● [0] ●●
- Number of invalid User Codes can be programmed from 0 (disable) to 9.
- Penalty Time can be programmed from 10 seconds to 90 seconds, incremental in 10s (i.e. 9 = 90 seconds).
Reset to Factory Default Settings
Reset to Factory Default Settings with a Master Code
Key Sequence
[#] [Master Code] ● [99] ● [99] ●●
Reset to Factory Default Settings without a Master Code
- 1. Remove one battery.
- 2. Press and hold the "0" button, then replace the battery.
- 3. Release the "0" button after green LED flashes twice and lock beeps twice.
- 4. Within 3 seconds, press the Star (✴) key 3 times.
- The green LED will light for 7 seconds and 2 beeps will sound.
- The lock is reset to the Factory Default Settings. All programming is deleted. Master Code is 12345.
Low Battery Warning
When the battery voltage is low, the red LED will flash 5 times before the green LED flashes to signal acceptance of the code. Batteries should be changed as soon as this happens. Only 200 operations are allowed under low battery condition. After 200 operations, User Codes will be disabled under low battery condition. Then, only Master Code can be used to unlock the lock, and LED indicator will flash in red for 10 times before the lock is unlocked.

Visit www.TownSteel.com for more.
17901 Railroad Street City of Industry, CA 91748 Toll Free: 877-858-0888
Tel: 626-965-8917 Fax: 626-965-8919

TownSteel e-Smart 4000 Series Programming Guide
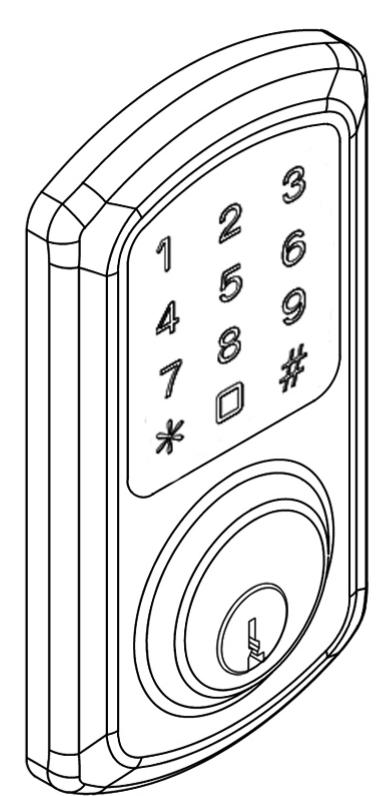
Index
| Definitions······································································2 |
|---|
| Factory Default Settings··················································· 3 |
|
Handing Information ·······················································
3 |
|
Important Notes ·····························································
4 |
|
Change Master Code·······················································
5 |
|
Add Credentials······························································
5 |
|
Add a
User Code |
| Add Multiple User Codes |
| Add User Keycards |
|
Delete Credentials···························································
7 |
| Delete User Code |
| Delete User Keycard |
| Reset to Factory Default Settings |
|
System Settings·····························································
8 |
| Dual Verification |
| Sound |
|
Reset to Factory Default Settings without
Master Code··········· 9 |
|
Low Battery
··································································· 9 |
Definitions
- Programming: Note before any Programming begins the deadbolt must be extended. Programming is changing, adding or deleting information in the lock.
- Credential: The lock requires a valid credential to operate. A credential can be a 6-10 digit Master Code, User Code, or Keycard/Fob.
- LED Indicator: The LED indicators are located around the keypad of the lock. Lock flashes green LED and/or red LED dependent on inputs. While unlocking, a red LED followed by a green LED means the lock is not programmed and can be unlocked with any 6-10 digit Code or Keycard/Fobs.
- Master Code: The Master Code programs all User Codes, Keycards/Fobs (Credentials), and System Settings. The Factory Default Settings' Master Code is 123456. This must be changed before programming the lock. Each lock has one Master Code. Master Code cannot be deleted.
- User Code: User Codes are used to operate the lock. User Codes are programmed by the Master Code. The lock can have a maximum of 400 User Codes (interchangeable with Keycards/Fobs).
- User Keycard/Fob: Keycards or Fobs can be used to operate the lock. Master Code is used to program User Keycards/Fobs. Swipe the touch keypad with a Keycard/Fob to operate the lock. The lock can have a maximum of 400 Keycards/Fobs (interchangeable with User Codes). Any standard Keycard/Fob can be programmed into the lock.
- Dual Verification Mode: Two valid credentials are needed to unlock the door.
- Sound: Keypad sound is enabled by Factory Default Settings. Disabling the sound only affects general operation, not during programming of the lock. During programming mode, lock will temporarily re-enable sound.
Factory Default Settings
Master Code: 123456
Penalty Time: 1 minute 30 seconds after 5 invalid entries
Dual Verification Mode: Disabled
Sound: Enabled
Handing Information - IMPORTANT
Lock will not function and you cannot program unless the handing is set. If you start programming or testing your lock before setting the handing the lock will not respond and you will need to reset the lock (see Reset Lock without Master Code on page 9). After resetting the lock proceed to Setting the Handing.
SETTING THE HANDING (Always do this with door open)
Steps
- 1. Confirm deadbolt is extended.
- 2. Confirm handing indicator on battery tray is in correct position (see assembly instructions) RH (Right Hand) or LH (Left Hand).
- 3. Confirm lock spindle is in correct position (see assembly instructions) Horizontal Position for RH or Vertical Position for LH.
- 4. Wake up keypad by swiping or tapping keypad surface- then press "0" key followed by "#" key.
After pressing "0" then "#", deadbolt will retract then extend again. This means lockset handing is set.
If there is an issue setting the handing: make sure Steps 1-3 are correct- if they are correct then go to: Reset Lock without Master Code on page 9. After you reset the lock try setting the handing again.
Important Notes
- To wake up the touch keypad from idle mode, gently swipe or tap the keypad.
- While in Factory Default Settings any credential will open the lock until a Master Code is programmed into the lock.
- When any credential is presented the lock will flash red, then green, and unlock.
- The Factory Default Setting's Master Code must be changed before programming any other codes or system settings.
- The Master Code cannot be deleted.
- A Master Code or User Code can be 6-10 digits (they do not need to be the same code length).
- Same credential, code or keycard, cannot be programmed twice in a lock.
- To open the lock using a valid credential enter a User Code or Master Code followed by pound (#) or swipe a Keycard/Fob. This will be followed by a green LED and the lock will remain open until pound (#) is pressed to extend the deadbolt.
- Pressing the asterisk (✴) key will cancel any on-going code input or programming sequence. Pressing asterisk (✴) two times will set the lock on idle.
- Pressing the asterisk (✴) key followed by pound (#) and entering the Master Code opens programming.
- During programming, allow for the lock's sounds to end before pressing any keys to make sure the system recognizes the programming sequence.
- During programming, the green LED indicates success and the red LED indicates failure.
- Outside of programming, the green LED indicates unlocked and the red LED indicates locked.
- To prevent unauthorized entry, the lockout feature is activated for 1 minute and 30 seconds after 5 invalid credential inputs have been inputted. During lockout, no credential will be accepted. Penalty time is 1 minute and 30 seconds, and the red LED and alarm will operate repeatedly for the duration of the penalty.
- This lock features anti-pry cryptographic functions. Users can add random digits before and/or after a valid code. Enter a valid code in the following method: "XXXCODEXXX" (limited to 15 random digits) followed by pound (#).
- Replacing batteries does not change existing settings.
The symbols and are used in this programming guide to represent the audio and visual cues the lock uses to show successful progression during the programming process.
Disclaimer: The codes used in the following examples are not recommended for actual valid codes - accepted protocol should be followed for secure codes - repeated strings of numbers are not secure.
Change Master Code (Note: before any programming begins deadbolt must be extended)
Key Sequence
For example , to change Master Code to "555555", press:
Notes
- Factory Default Setting's Master Code is 123456. It must be changed with the user's own Master Code immediately.
- Manufacturer assumes no liability, direct or indirect, due to failure to change Master Code.
- No other programming will be accepted until Factory Default Setting's Master Code has been changed.
- Master Code can be changed at any time. Changing the Master Code does not affect other lock settings.
- A lock has only one Master Code. Multiple locks can have the same Master Code.
Add Credentials
Add a User Code
Key Sequence
For example , to add User Code of "202020", press:
Add Multiple User Codes
Key Sequence
1st User Code Key Sequence


Notes
- The input of additional credentials must start before lock goes into Idle Mode (12 seconds). If the lock goes into Idle Mode, start the key sequence from the beginning.
- To exit, press asterisk (✴ ) or wait until the lock goes into Idle Mode (12 seconds).
Add Keycard or Key Fob
Key Sequence
For example, the Master Code in sequence above is 555555.
Notes
- Keycards/Fobs can be added interchangeably with User Codes.
- Multiple Keycards/Fobs can be added during the same programming sequence (like Additional User Codes Key Sequence).
- To exit, press asterisk (✴ ) or wait until the lock goes into Idle Mode (12 seconds).
Delete Credentials
Delete User Codes
Key Sequence
Master Code User Code
For example , to delete User Code "202020", assuming the Master Code is "555555", press:
Delete User Key Cards Key Sequence
Master Code Tap Reader with Keycard
Notes
- Multiple Keycards/Fobs can be deleted during the same programming sequence (like Additional User Codes Key Sequence).
- To exit, press asterisk (✴ ) or wait until the lock goes into Idle Mode (12 seconds).
Reset Lock to Factory Default Settings
Key Sequence - Confirms - Cancels - Cancels - Cancels - Cancels - Cancels - Cancels - Cancels - Cancels - Cancels - Cancels - Cancels - Cancels - Cancels - Cancels - Cancels - Cancels - Cancels - Cancels - Cancels - Cancels - Cancels - Cancels - Cancels - Cancels - Cancels - Cancels - Cancels - Cancels - Cancels - Cancels - Cancels - Cancels - Cancels - Cancels - Cancels - Cancels - Cancels - Cancels - Cancels - Cancels - Cancels - Cancels - Cancels - Cancels - Cancels - Cancels - Cancels - Cancels - Cancels - Cancels - Cancels - Cancels - Cancels - Cancels - Cancels - Cancels - Cancels - Cancels - Cancels - Cancels - Cancels - Cancels - Cancels - Cancels - Cancels - Cancels - Cancels - Cancels - Cancels - Cancels - Cancels - Cancels - Cancels - Cancels - Cancels - Cancels - Cancels - Cancels - Cancels - Cancels - Cancels - Cancels - Cancels - Cancels - Cancels - Cancels - Cancels - Cancels - Cancels - Cancels - Cancels - Cancels - Cancels - Cancels - Cancels - Cancels - Cancels - Cancels - Cancels - Cancels - Cancels - Cancels - Cancels - Cancels - Cancels - Cancels - Cancels - Cancels - Cancels - Cancels - Cancels - Cancels - Cancels - Cancels - Cancels - Cancels - Cancels - Cancels - Cancels - Cancels - Cancels - Cancels - Cancels - Cancels - Cancels - Cancels - Cancels
Notes: All credentials will be deleted, and the lock will reset to Factory Default Settings.
System Settings
Dual Verification Mode
Key Sequence

Notes
- Dual Verification Mode, when enabled, requires 2 valid credentials to operate the lock.
- A credential can be a Master Code, User Codes, or Keycards/Fobs.
- The Factory Default Setting is set to one credential.
Adjust Keypad Sound
Key Sequence
.

- Disabling the sound only affects general operation, not during programming of the lock.
- During programming mode, lock will temporarily re-enable sound.
Reset Lock to Factory Default Settings without a Master Code
Steps
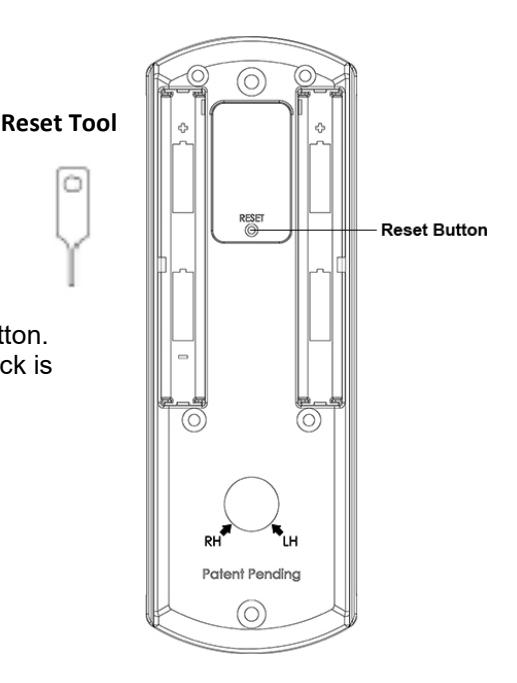
- 1. Unscrew the back cover.
- 2. Locate the reset button on the battery holder.
- 3. Using the reset tool or a small paperclip, insert the tool into the reset button hole and press and hold the reset button . After approximately 4 seconds, the lock will beep 2 times, and you can release the reset button.
- 4. The green LED indicator will light up and it will beep 1 time indicating lock is reset.
Result
Lock is reset to Factory Default Settings. All codes are deleted and Master Code changes to 123456.
Low Battery Warning
When the battery voltage is low, unlocking the lock will activate a sound indicator as well as a yellow LED, followed by a red LED to indicate low power. Batteries should be changed as soon as this happens.

When locking under low battery voltage condition, the lock will only use the warning sound to indicate low power. Only 200 operations are allowed under low battery condition - must change batteries to ensure lock operates properly.

Visit www.Townsteel.com for more.
17901 Railroad Street City of Industry, CA 91748 Toll Free: 877-858-0888
Fax: 626-965-8919

TownSteel e-Smart 5000-BLE Series Programming Guide
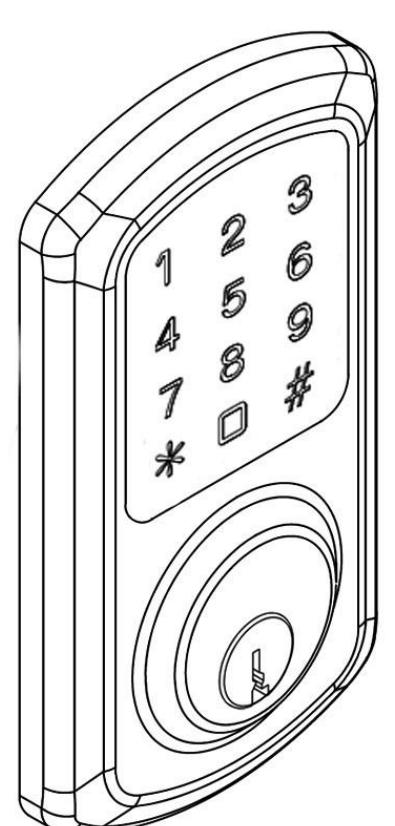
Index
|
Bluetooth Information·······················································
2 |
|---|
| Definitions······································································3 |
| Factory Default Settings··················································· 4 |
|
Handing Information ·······················································
4 |
|
Important Notes ·····························································
5 |
|
Change Master Code·······················································
6 |
|
Add Credentials······························································
6 |
| Add a User Code |
| Add Multiple User Codes |
| Add User Keycards |
|
Delete Credentials···························································
8 |
| Delete User Code |
| Delete User Keycard |
| Reset to Factory Default Settings |
|
System Settings·····························································
9 |
| Dual Verification |
| Sound |
|
Reset to Factory Default Settings w/o Master Code··············
10 |
|
Low Battery
·································································· 10 |
GENERAL LOCK INFORMATION FOR THE BLUETOOTH FUNCTION
The 5000 Series BLE lock is a versatile lock- it can be operated by a 6-10 digit PIN code, RFID card/FOB or through your smart phone APP via Bluetooth Low Energy (BLE).
The APP is called TSE Home- it is available for Android and IOS.
The lock is operable without the APP (can use PIN codes and RFID credentials), the APP provides access to the BLE features.
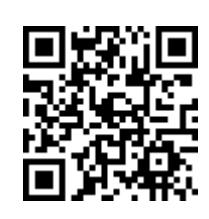
Scan for additional information
Pairing with the smart phone: Only 1 smart phone can be the administrator (paired with the lock), multiple smart phones can be added as users. If someone else has paired with the lock and they wish to turn it over to another administrator they can unbind the lock through their APP or you can reset the lock (see- Reset Lock to Factory Default Settings).
APP- download the TSE Home APP. Create a login- with your phone number or email account.
Once you have logged in successfully and are registered you can use the APP to operate your smart lock.
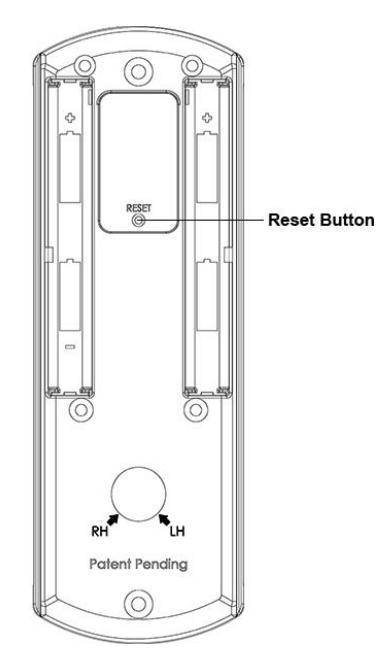
Add a lock- click on the upper left on the APP to access the menu. Click on "Add Network Connected Device"> "Bluetooth Lock"- the screen will come up to "Add Bluetooth Lock"- press the reset button on the back of the battery tray (see page 10) click "Next"- lock will pair with your smart phone- name the device in your APP and click "Completed". The APP will go back to the home screen.
Change your Master Code (see page 5) to avoid any unauthorized entry or operation of the lock.
You can now unlock the lock, when in Bluetooth range, using the APP.
See the APP (or scan QR code) for additional features of adding Users, codes, etc.
Definitions
- Credential: The lock requires a valid credential to operate. A credential can be a 6-10 digit Master Code, User Code, or Keycard/Fob.
- LED Indicator: The LED indicators are located around the keypad of the lock. Lock flashes green LED and/or red LED dependent on inputs. While unlocking, a red LED followed by a green LED means the lock is not programmed and can be unlocked with any 6-10 digit code or Keycard/Fobs.
- Master Code: The Master Code programs all User Codes, Keycards/Fobs (Credentials), and System Settings. The Factory Default Setting's Master Code is 123456. This must be changed before programming the lock. Each lock has one Master Code. Master Code cannot be deleted.
- User Code: User Codes are used to operate the lock. User Codes are programmed by the Master Code. The lock can have a maximum of 400 User Codes (interchangeable with Keycards/Fobs).
- User Keycard/Fob: Keycards or Fobs can be used to operate the lock. Master Code is used to program User Keycards/Fobs. Swipe the touch keypad with a Keycard/Fob to operate the lock. The lock can have a maximum of 400 Keycards/Fobs (interchangeable with User Codes). Standard MIFARE Keycards/Fobs can be programmed into the lock.
- Dual Verification Mode: Two valid credentials are needed to unlock the door.
- Sound: Keypad sound is enabled by Factory Default Settings. Disabling the sound only affects general operation, not during programming of the lock. During programming, lock will temporarily re-enable sound.
Factory Default Settings
Master Code: 123456
Penalty Time: 1 minute 30 seconds after 5 invalid entries
Dual Verification Mode: Disabled
Sound: Enabled
Handing Information - IMPORTANT
Lock will not function and you cannot program unless the handing is set. If you start programming or testing your lock before setting the handing the lock will not respond and you will need to reset the lock (see Reset Lock without Master Code on page 10). After resetting the lock proceed to Setting the Handing.
SETTING THE HANDING (Always do this with door open)
Steps
- 1. Confirm deadbolt is extended.
- 2. Confirm handing indicator on battery tray is in correct position (see assembly instructions) RH (Right Hand) or LH (Left Hand).
- 3. Confirm lock spindle is in correct position (see assembly instructions) Horizontal Position for RH or Vertical Position for LH.
- 4. Wake up keypad by swiping or tapping keypad surface- then press "0" key followed by "#" key.
After pressing "0" then "#", deadbolt will retract then extend again. This means lockset handing is set.
If there is an issue setting the handing: make sure Steps 1-3 are correct- if they are correct then go to: Reset Lock without Master Code on page 10. After you reset the lock try setting the handing again.
Important Notes
- To wake up the touch keypad from idle mode, gently swipe or tap the keypad.
- While in Factory Default Settings any credential will open the lock until a Master Code is programmed into the lock.
- When any credential is presented the lock will flash red, then green, and unlock.
- The Factory Default Setting's Master Code must be changed before programming any other codes or system settings.
- The Master Code cannot be deleted.
- A Master Code or User Code can be 6-10 digits (they do not need to be the same code length).
- Same credential, code or keycard, cannot be programmed twice in a lock.
- To open the lock using a valid credential enter a User Code or Master Code followed by pound (#) or swipe a Keycard/Fob. This will be followed by a green LED and the lock will remain open until pound (#) is pressed to extend the deadbolt.
- Pressing the asterisk (✴) key will cancel any on-going code input or programming sequence. Pressing asterisk (✴) two times will set the lock on idle.
- Pressing the asterisk (✴) key followed by pound (#) and entering the Master Code opens programming.
- During programming, allow for the lock's sounds to end before pressing any keys to make sure the system recognizes the programming sequence.
- During programming, the green LED indicates success and the red LED indicates failure.
- Outside of programming, the green LED indicates unlocked and the red LED indicates locked.
- To prevent unauthorized entry, the lockout feature is activated for 1 minute and 30 seconds after 5 invalid credential inputs have been inputted. During lockout, no credential will be accepted. Penalty time is 1 minute and 30 seconds, and the red LED and alarm will operate repeatedly for the duration of the penalty.
- This lock features anti-pry cryptographic functions. Users can add random digits before and/or after a valid code. Enter a valid code in the following method: "XXX - CODE - XXX" (15 random digits are the limit), followed by pound (#). Note: due to this feature- do not program codes of different lengths that have a sequential string of 6 digits that are the same.
- Replacing batteries does not change existing settings.
The symbols and are used in this programming guide to represent the audio and visual cues the lock uses to show successful progression during the programming process.
Disclaimer: The codes used in the following examples are not recommended for actual valid codes - accepted protocol should be followed for secure codes - repeated strings of numbers are not secure.
Change Master Code (Note: before any programming begins deadbolt must be extended)
Key Sequence
For example , to change Master Code to "555555", press:
Notes
- Factory Default Setting's Master Code is 123456. It must be changed with the user's own Master Code immediately.
- Manufacturer assumes no liability, direct or indirect, due to failure to change Master Code.
- No other programming will be accepted until Factory Default Setting's Master Code has been changed.
- Master Code can be changed at any time. Changing the Master Code does not affect other lock settings.
- A lock has only one Master Code. Multiple locks can have the same Master Code.
Add Credentials
Add a User Code
Key Sequence
For example , to add User Code of "202020", press:
Add Multiple User Codes
Key Sequence
1 st User Code Key Sequence

For example , to add User Codes "202020", "303030", and "404040", press:

Notes
- The input of additional credentials must start before lock goes into Idle Mode (12 seconds). If the lock goes into Idle Mode, start the key sequence from the beginning.
- To exit, press asterisk (* ) or wait until the lock goes into Idle Mode (12 seconds).
Add Keycard or Key Fob
Key Sequence

For example, the Master Code in sequence above is 555555.
Notes
- Keycards/Fobs can be added interchangeably with User Codes.
- Multiple Keycards/Fobs can be added during the same programming sequence (like Additional User Codes Key Sequence).
- To exit, press asterisk (* ) or wait until the lock goes into Idle Mode (12 seconds).
Delete Credentials
Delete User Codes
Key Sequence
For example , to delete User Code "202020", assuming the Master Code is "555555", press:
Delete User Key Cards
Key Sequence
Notes
- Multiple Keycards/Fobs can be deleted during the same programming sequence (like Additional User Codes Key Sequence).
- To exit, press asterisk (* ) or wait until the lock goes into Idle Mode (12 seconds).
Reset Lock to Factory Default Settings
Key Sequence
Note
All credentials will be deleted, and the lock will reset to Factory Default Settings.
System Settings
Dual Verification Mode
Key Sequence

Notes
- Dual Verification Mode, when enabled, requires 2 valid credentials to operate the lock.
- A credential can be a Master Code, User Codes, or Keycards/Fobs.
- The Factory Default Setting is set to one credential.
Adjust Keypad Sound
.
Key Sequence

Notes
- Disabling the sound only affects general operation, not during programming of the lock.
- During programming mode, lock will temporarily re-enable sound.
Reset Lock to Factory Default Settings without a Master Code
Steps
- 1. Unscrew the back cover.
- 2. Locate the reset button on the battery holder.
- 3. Press and hold the reset button . After approximately 4 seconds, the lock will beep 2 times, and you can release the reset button.
- 4. The green LED indicator will light up and it will beep 1 time indicating lock is reset.
Result
Lock is reset to Factory Default Settings. All codes are deleted and Master Code changes to 123456.
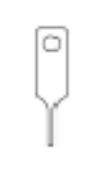
Reset Tool
Low Battery Warning
When the battery voltage is low, unlocking the lock will activate a sound indicator as well as a yellow LED, followed by a red LED to indicate low power. Batteries should be changed as soon as this happens.

When locking under low battery voltage condition, the lock will only use the warning sound to indicate low power. Only 200 operations are allowed under low battery condition - must change batteries to ensure lock operates properly.

Visit www.TownSteel.com for more.
17901 Railroad Street City of Industry, CA 91748
Toll Free: 877-858-0888
Tel: 626-965-8917
Fax: 626-965-8919

TownSteel\ne-Smart 5000-RF Series Programming Guide
Index
|
General Information for Wi-Fi Functions·······························
2 |
|---|
| Definitions······································································4 |
| Factory Default Settings··················································· 5 |
|
Handing Information ·······················································
5 |
|
Important Notes ·····························································
6 |
|
Change Master Code·······················································
7 |
|
Add Credentials······························································
7 |
| Add a User Code |
| Add Multiple User Codes |
| Add User Keycards |
|
Delete Credentials···························································
9 |
| Delete User Code |
| Delete User Keycard |
| Reset to Factory Default Settings |
|
System Settings····························································
10 |
| Dual Verification |
| Sound |
|
Reset to Factory Default Settings w/o Master Code··············
11 |
|
Low Battery
·································································· 11 |
GENERAL LOCK INFORMATION FOR THE Wi-Fi FUNCTION
The 5000-RF Series lock is a versatile lock- it can be operated by a 6-10 digit PIN code, RFID card/FOB or through your smart phone APP via Wi-Fi.
The APP is called TSE Home- it is available for Android and IOS.
The lock is operable without the APP (can use PIN codes and RFID credentials), the APP provides access to the Wi-Fi features. The lock and APP require a Gateway to be used to interface between the lock-router-cloud-smartphone.
APP- download the TSE Home APP. Create a login. An email with a link will be sent to your login email. To activate your account you must click on the link within five minutes. If the account is not activated the previous steps must be repeated. The link will activate your account and allow you to login.
Once you have registered and log in successfully you can use the APP to pair with your Smart lock.
Pairing with your Smart lock: Only 1 smartphone can be the administrator (paired with the lock and Gateway), multiple smart phones can be added as users. If someone else has paired with the Gateway and lock and they wish to turn it over to another administrator they can unbind (disconnect) the Gateway and lock through their APP or you can reset the lock (see-Reset Lock to Factory Default Settings) and Gateway (see this section).
Pairing Button
Reset Button
LED
Before programming anything with the APP it is recommended you change your Master Code (see- Change Your Master Code) to avoid any unauthorized entry or operation of the lock. The new Master Code will be your administrator password (do not share).
In order to use the APP you must pair (connect) with the Gateway.
When you are ready to pair with the Gateway plug the Gateway into a wall socket. It should be placed within range of your Wi-Fi router and a place not likely to be unplugged. In order to pair the Gateway with the
Smartphone they must be on the same Wi-Fi connection. You will need your Wi-Fi password. The APP is not compatible with 5G networks.
Click on the upper left corner of the APP to access the menu. Click on "Gateway Management"> "Add Gateway"> "Wi-Fi Gateway". Your Gateway is plugged in and the LED should be flashing- if flashing click "Next Step" on the APP- enter W-iFi password> "Next Step"- APP will pair with the Gateway. If the Gateway LED is not flashing- Reset the Gateway- use a small paperclip to press and hold the reset button on the Gateway- Gateway will beep 5 times- release the reset button and in about 10 seconds the LED will start flashing indicating the Gateway is in search mode. You can now pair with the Gateway.
After the Gateway is paired you can now pair with the lock.
Add a lock- click on the upper left on the APP to access the menu. Click on "Add Network Connected Device"- "Gateway Door Lock"- the screen will come up to "Add Door Lock"- press the reset button on the back of the battery tray (see page 11) click "Add Door Lock"- lock will pair with your Smart Phone and Gateway- name the device in your APP and click "Completed". The APP will go back to the home screen.
You can now unlock the lock using the APP.
See the APP for additional features of adding additional Users, codes, etc.
Definitions
- Credential: The lock requires a valid credential to operate. A credential can be a 6-10 digit Master Code, User Code, or Keycard/Fob.
- LED Indicator: The LED indicators are located around the keypad of the lock. Lock flashes green LED and/or red LED dependent on inputs. While unlocking, a red LED followed by a green LED means the lock is not programmed and can be unlocked with any 6-10 digit Code or Keycard/Fobs.
- Master Code: The Master Code programs all User Codes, Keycards/Fobs (Credentials), and System Settings. The Factory Default Settings' Master Code is 123456. This must be changed before programming the lock. Each lock has one Master Code. Master Code cannot be deleted.
- User Code: User Codes are used to operate the lock. User Codes are programmed by the Master Code. The lock can have a maximum of 400 User Codes (interchangeable with Keycards/Fobs).
- User Keycard/Fob: Keycards or Fobs can be used to operate the lock. Master Code is used to program User Keycards/Fobs. Swipe the touch keypad with a Keycard/Fob to operate the lock. The lock can have a maximum of 400 Keycards/Fobs (interchangeable with User Codes). Any standard Keycard/Fob can be programmed into the lock.
- Dual Verification Mode: Two valid credentials are needed to unlock the door.
- Sound: Keypad sound is enabled by Factory Default Settings. Disabling the sound only affects general operation, not during programming of the lock. During programming mode, lock will temporarily re-enable sound.
Factory Default Settings
Master Code: 123456
Penalty Time: 1 minute 30 seconds after 5 invalid entries
Dual Verification Mode: Disabled
Sound: Enabled
Handing Information - IMPORTANT
Lock will not function and you cannot program unless the handing is set. If you start programming or testing your lock before setting the handing the lock will not respond and you will need to reset the lock (see Reset Lock without Master Code on page 11). After resetting the lock proceed to Setting the Handing.
SETTING THE HANDING (Always do this with door open)
Steps
- 1. Confirm deadbolt is extended.
- 2. Confirm handing indicator on battery tray is in correct position (see assembly instructions) RH (Right Hand) or LH (Left Hand).
- 3. Confirm lock spindle is in correct position (see assembly instructions) Horizontal Position for RH or Vertical Position for LH.
- 4. Wake up keypad by swiping or tapping keypad surface- then press "0" key followed by "#" key.
After pressing "0" then "#", deadbolt will retract then extend again. This means lockset handing is set.
If there is an issue setting the handing: make sure Steps 1-3 are correct- if they are correct then go to: Reset Lock without Master Code on page 11. After you reset the lock try setting the handing again.
Important Notes
- To wake up the touch keypad from idle mode, gently swipe or tap the keypad.
- While in Factory Default Settings any credential will open the lock until a Master Code is programmed into the lock.
- When any credential is presented the lock will flash red, then green, and unlock.
- The Factory Default Setting's Master Code must be changed before programming any other codes or system settings.
- The Master Code cannot be deleted.
- A Master Code or User Code can be 6-10 digits (they do not need to be the same code length).
- Same credential, code or keycard, cannot be programmed twice in a lock.
- To open the lock using a valid credential enter a User Code or Master Code followed by pound (#) or swipe a Keycard/Fob. This will be followed by a green LED and the lock will remain open until pound (#) is pressed to extend the deadbolt.
- Pressing the asterisk (✴) key will cancel any on-going code input or programming sequence. Pressing asterisk (✴) two times will set the lock on idle.
- Pressing the asterisk (✴) key followed by pound (#) and entering the Master Code opens programming.
- During programming, allow for the lock's sounds to end before pressing any keys to make sure the system recognizes the programming sequence.
- During programming, the green LED indicates success and the red LED indicates failure.
- Outside of programming, the green LED indicates unlocked and the red LED indicates locked.
- To prevent unauthorized entry, the lockout feature is activated for 1 minute and 30 seconds after 5 invalid credential inputs have been inputted. During lockout, no credential will be accepted. Penalty time is 1 minute and 30 seconds, and the red LED and alarm will operate repeatedly for the duration of the penalty.
- This lock features anti-pry cryptographic functions. Users can add random digits before and/or after a valid code. Enter a valid code in the following method: "XXXCODEXXX" (limited to 15 random digits) followed by pound (#).
- Replacing batteries does not change existing settings.
The symbols and are used in this programming guide to represent the audio and visual cues the lock uses to show successful progression during the programming process.
Disclaimer: The codes used in the following examples are not recommended for actual valid codes - accepted protocol should be followed for secure codes - repeated strings of numbers are not secure.
Change Master Code
Key Sequence
For example , to change Master Code to "555555", press:
Notes
- Factory Default Setting's Master Code is 123456. It must be changed with the user's own Master Code immediately.
- Manufacturer assumes no liability, direct or indirect, due to failure to change Master Code.
- No other programming will be accepted until Factory Default Setting's Master Code has been changed.
- Master Code can be changed at any time. Changing the Master Code does not affect other lock settings.
- A lock has only one Master Code. Multiple locks can have the same Master Code.
Add Credentials
Add a User Code
Key Sequence
For example , to add User Code of "202020", press:
Add Multiple User Codes
Key Sequence
1 st User Code Key Sequence

For example , to add User Codes "202020", "303030", and "404040", press:

Notes
- The input of additional credentials must start before lock goes into Idle Mode (12 seconds). If the lock goes into Idle Mode, start the key sequence from the beginning.
- To exit, press asterisk (✴ ) or wait until the lock goes into Idle Mode (12 seconds).
Add Keycard or Key Fob
Key Sequence

For example, the Master Code in sequence above is 555555.
Notes
- Keycards/Fobs can be added interchangeably with User Codes.
- Multiple Keycards/Fobs can be added during the same programming sequence (like Additional User Codes Key Sequence).
- To exit, press asterisk (✴ ) or wait until the lock goes into Idle Mode (12 seconds).
Delete Credentials
Delete User Codes Key Sequence
For example , to delete User Code "202020", assuming the Master Code is "555555", press:
Delete User Key Cards Key Sequence
Master Code Tap Reader with Keycard
Notes
- Multiple Keycards/Fobs can be deleted during the same programming sequence (like Additional User Codes Key Sequence).
- To exit, press asterisk (✴ ) or wait until the lock goes into Idle Mode (12 seconds).
Reset Lock to Factory Default Settings
Key Sequence

Notes
All credentials will be deleted, and the lock will reset to Factory Default Settings.
System Settings
Dual Verification Mode
Key Sequence

Notes
- Dual Verification Mode, when enabled, requires 2 valid credentials to operate the lock.
- A credential can be a Master Code, User Codes, or Keycards/Fobs.
- The Factory Default Setting is set to one credential.
Adjust Keypad Sound
Key Sequence
.

Notes
- Disabling the sound only affects general operation, not during programming of the lock.
- During programming mode, lock will temporarily re-enable sound.
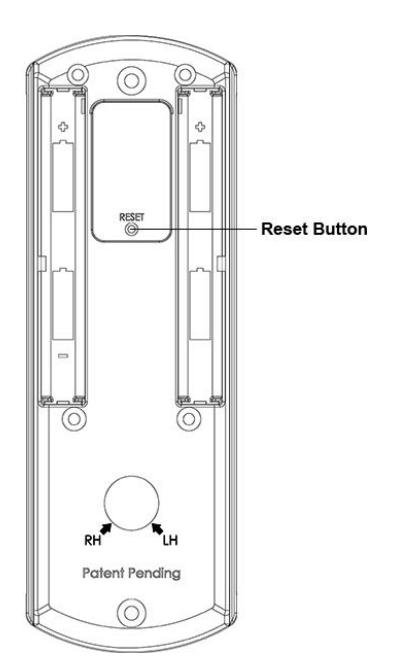
Reset Lock to Factory Default Settings without a Master Code
Steps
- 1. Unscrew the back cover.
- 2. Locate the reset button on the battery holder.
- 3. Press and hold the reset button . After approximately 4 seconds, the lock will beep 2 times, and you can release the reset button.
- 4. The green LED indicator will light up and it will beep 1 time indicating lock is reset.
Result
Lock is reset to Factory Default Settings. All codes are deleted and Master Code changes to 123456.
Low Battery Warning
When the battery voltage is low, unlocking the lock will activate a sound indicator as well as a yellow LED, followed by a red LED to indicate low power. Batteries should be changed as soon as this happens.

When locking under low battery voltage condition, the lock will only use the warning sound to indicate low power. Only 200 operations are allowed under low battery condition - must change batteries to ensure lock operates properly.

Visit www.TownSteel.com for more.
17901 Railroad Street City of Industry, CA 91748 Toll Free: 877-858-0888
Tel: 626-965-8917 Fax: 626-965-8919