Alarm Lock User Guide for ALC6-4 Security System
Open the original PDF document
View PDFOPERATING GUIDE FOR YOUR ALARM LOCK ALC6-4 SECURITY SYSTEM
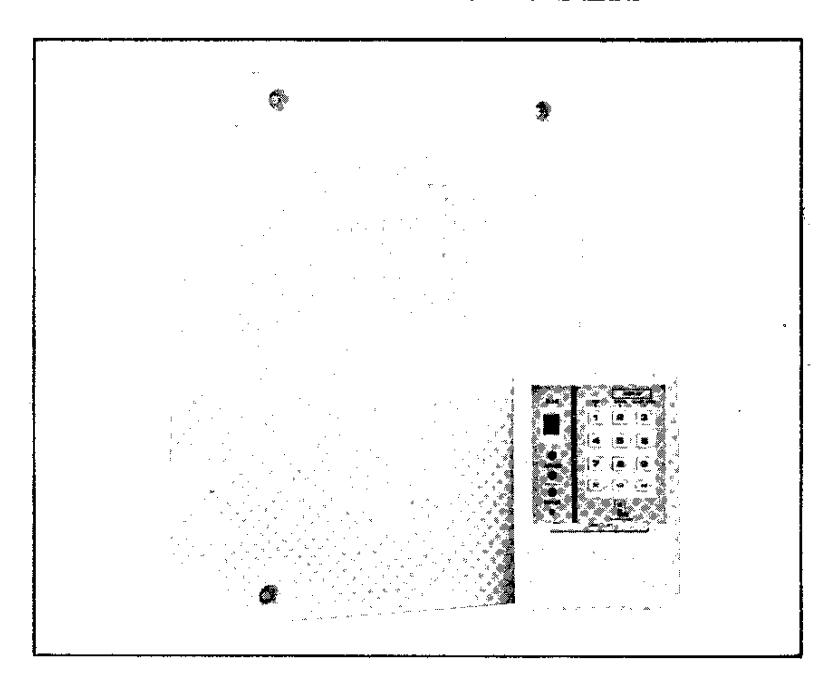
Please read this guide thoroughly before using your new system to familiarize yourself with its features and operation. And keep this booklet handy for future reference.
You'll probably find items mentioned in this booklet that don't appear to apply to your system -- and they probably don't! Alarm Lock control panels have such a wide variety of features that few systems, if any, will ever need them all. Your alarm dealer has chosen the appropriate features for your application. Ask him about them.
Your system has been carefully designed and engineered to the highest industry standards. To provide optimum safety and security, all users should become comfortable with the operation of this equipment and periodically check its condition and state of readiness.

Table of Contents
| Section | |
|---|---|
| Glossary of Terms | 3 |
| Keypad Controls & Indicators | 4 |
| Understanding Your Security System | 5 |
| Using Your Security System | 5 |
| Protecting Your Premises While You Are Away | 6 |
| Protecting Yourself While You Are On The Premises | 7 |
| The Digital Communicator | 7 |
| Programming | 8 |
GLOSSARY OF TERMS
- Abort Delay A delay period that allows the system to be reset before it reports to a central station.
- Arm/Disarm Codes Personal Arm/Disarm Codes may contain up to four digits. They are used to arm and disarm the system from the keypad, and also to access the Program Mode. (See PROGRAMMING.) Up to four different codes may be programmed. Arming/Disarming Turning your system on or off. This is done by entering your
code at the keypad.
- Battery Standby battery is placed in the control-panel enclosure to provide backup protection in the event of a power loss.
- Bypass Key Labelled "B" on the keypad. Lets you manually remove one or more protective zones from the system.
- Central Station Monitors incoming burglary and emergency messages from a digital communicator and alerts the proper authorities (optional feature).
- Communicator Reports burglary and emergencies directly to the central station over telephone lines.
- Control Panel The heart of your security system, it controls all system functions.
- Exit/Entry Delay Lets you exit and enter your premises without setting off an alarm after the system is armed.
- Hold-Down Function Many keys have secondary functions that are activated by holding down a number until a beep sounds.
- Keypad Puts control-panel functions at your fingertips. It can be mounted either at the control panel or anywhere in your premises.
- Panic Buttons Two buttons ([*] and [*]) on the keypad that will alert the central station of an emergency. Also used to exit the Program Mode. (See PROGRAMMING.)
- Report A communication sent to a central station indicating a specific change in condition of the security system (alarm, trouble, low battery, etc.) (optional).
- Sounder Local warning device at each keypad alerts that entry delay time has started. It also sounds when you attempt to arm the system if a zone is in "trouble", and also verifies contact with a central station (optional).
- Trouble An open door, window, or other problem on a zone that may prevent arming.
- Zones Independent circuits that protect specific areas of your premises.
- Auto-Bypass Zone: A zone capable of being automatically bypassed from the protection system if it is in "trouble" (faulty) when the system is armed.
- Burglary Zone: Detects intrusion.
- Day Zone: A zone programmed to cause visual and audible (optional) indication at the keypad when it is in "trouble" while disarmed.
- Exit/Entry Follower Zone: Provides exit and entry delay for interior devices. Entry delay only occurs if re-entry takes place through the normal exit/entry door.
- Group-Bypass Zones: A group of zones programmed so they can be manually bypassed all at once.
- Priority Zone: A zone that prevents arming if in "trouble".
- Selective-Bypassed Zone: A zone that can be individually bypassed using the Bypass Key [B].
- Trouble Zone: A zone that cannot be armed because of an open window, door or other problem in the area.
- 24-Hour Zone: A zone that is armed and ready at all times to respond to an emergency situation.
KEYPAD CONTROLS AND INDICATORS
Numerical Display
- Flashes number(s) indicates which non-24-Hour Zones are in an alarm condition, and which Day Zones are in a trouble condition.
- Flashes "P" (with steady sounder) indicates a priority condition (armed with a Priority Zone in trouble, armed without resetting a Day Zone, or armed without ac power available to the system).
ARMED (Red) Light
- Steady system is armed.
- Flashes alarm on a non-24-Hour Zone.
- Flashes (fast) entry delay cancelled.
READY (Green) Light
- Steady system disarmed, all non-24-Hour Zones okay.
- Flashes trouble on any non-24-Hour Zone.
- Flashes (fast) trouble on a Day Zone.
BYPASS (Yellow) Light
• Steady - one or more zones manually bypassed.
Sounder (To stop sounder "trouble" warnings, hold down Key [9] for 2 seconds.)
- Steady Tone: A Priority condition exists.
- Steady Tone (when entering): Entry delay in progress.
- Beep (3 second): "Door Chime" feature on Zone 1.
- · Beep (2 seconds): System armed with a zone in trouble.
- Pulsing: Day Zone is in trouble.
KEYS
NOTE: Unless otherwise noted, the following numerical keys are held down for 2 seconds (until sounder beeps) to perform their designated hold-down functions.
- Key [1]: TEST Momentarily sounds the burglar alarm. If no alarm is heard, or\nif it is weak, the battery may need replacing. Use this test weekly. (Hold key down until beep sounds.)
- Key [2]: DISPLAY BYPASS Numerically displays zones that have been bypassed. (Hold key down until all zones have been displayed.)
- Key [3]: DISPLAY ZONES OPEN Numerically displays zone(s) in trouble. (Hold key down until all zones have been displayed.)
- Key [4]: INSTANT PROTECTION Cancels entry delay when arming. The delay is restored after you disarm the system. (Hold key down until beep sounds.)
- Key [5]: ONE-BUTTON ARMING (If Programmed) Momentary press permits quick arming. (Disarming still requires entry of the complete code.)
- e Key [6]: DOOR CHIME This will activate a feature that sounds a 3-second tone at the keypad each time the entry door on Zone 1 is opened. This feature only works when the alarm system is disarmed (off). To deactivate the door-chime feature, hold Key [6] down again until the beep sounds.
- Key [8]: PROGRAM Allows you to enter the program mode. Hold down Key [8] until the beep sounds. See PROGRAMMING.
- Key [9]: RESET Resets ac power loss indication. Also, clears numerical display after alarm and system disarmed. (Hold down until beep sounds.)
- Key [B]: Bypass Momentarily press Key [B] to manually bypass a zone. See Arming With Selective Zone Bypassing.
- Keys [*] and [*]: PANIC BUTTONS Pressing these two keys momentarily will activate the Panic Zone. Also used to exit the Program mode.
UNDERSTANDING YOUR SECURITY SYSTEM
Your Alarm Lock security system comprises:
Zones. Your system contains a number of zones, which may be selected for burglary or panic alarms. Each zone is an independent circuit that protects specific areas of your home, business or office. For example, your dealer may have set aside a zone for window protection, exit/entry delay, interior space protection, safe and valuables protection or emergencies. Each zone can be programmed to react in a specific manner. Be certain that you know what each zone protects.
The Keypad. Lets you arm and disarm the system, check the condition of each zone, temporarily bypass individual (or a group of) zones, cancel entry delay, test the alarm device, reset detection devices, reset a Day Zone indication. Three lights, a sounder and a numerical display monitor the system.
The Alarm Output. When any zone is activated, the control panel responds by sounding an audible alarm and/or alerting a central station (optional). Your dealer has programmed your system to react in a specific manner to each type of emergency. Learn how your system responds to these emergencies.
USING YOUR SECURITY SYSTEM
The Keypad. All security system operations are carried out at the keypad. Each key has a special function (see KEYPAD CONTROLS) plus the ability to arm and disarm the system when they are used in a preselected combination (code).
Arm/Disarm Codes. You can program different codes for up to four users, each code containing up to four digits (the use of all 4 digits is recommended). These codes allow you to arm and disarm your system. Any code may be easily changed so that former users may be denied access to the system. The system will respond only when an active code has been entered at the keypad.
Selecting Your Codes. After your dealer installs your system he will show you how to change your Arm/Disarm Code and how more codes may be added later.
Press Key [8] (hold down for two seconds). This allows you to enter the Programming Mode. Refer to PROGRAMMING for programming instructions. For optimum security, do not select obvious combinations, such as consecutive numbers, your street or telephone number, birth date, etc., for your Arm/Disarm Codes.
PROTECTING YOUR PREMISES WHILE YOU ARE AWAY
If the three lights on your keypad are blinking, you have lost ac power. Check if there has been a general power outage, or if the control panel transformer is disconnected. If you must operate without ac power, hold down Key [9] until a beep sounds to stop the lights from blinking. Next test your system by holding down Key [1]. If the alarm doesn't sound, or is weak, replace the battery. Always test your system weekly.
Arming The System Before You Leave. Test your system by using Key [1]. Check the green READY light at the keypad. If it is on, enter your code. The red light will come on and the green light will go off.
Leave immediately through your regular entry door before the delay time runs out. If you wait too long, the sounder will warn that the entry delay has started. To avoid causing an alarm, quickly return to the keypad and enter your code to reset the control panel. You may then arm the system again.
Arming With A Zone In Trouble. A flashing green READY light indicates that at least one non-24-Hour Zone is in trouble; that is, the zone is in an open condition. If a Day Zone is open, the zone will also display numerically and the sounder will be pulsing. Any zone in trouble can be displayed numerically by holding down Key [3] until a beep sounds. Try to fix the zone by closing an open window, door, etc. If a Day Zone is in trouble, reset the Day Zone indication by holding down Key [9] until a beep sounds. The green READY light will now stay on and the system may be armed.
If a zone cannot be fixed immediately, it still may be possible to arm without the protection of that zone. Check with your installer. If Auto-Bypass has been selected for the zone in trouble, simply arm your system. A short beep will sound at the keypad. This indicates that a zone has been auto-bypassed, meaning it cannot now cause an alarm.
If the zone has been programmed for Selective Bypass, pressing Key [B] and then the number of the zone will manually bypass that zone. Group-Bypass zones are a group of zones that can all be manually bypassed at the same time simply by pressing Key [B] twice. You may use Key [2] to numerically display selective or group bypassed zones.
You will not be able to arm your system if (a) a zone selected as a Priority Zone is in trouble, (b) a Day Zone numerical display indication is still flashing, or (c) the three lights are flashing due to an ac power failure. If you attempt to arm, the sounder will come on and a "P" will be displayed. Enter your code again, and reset the digital display memory or ac failure indication by holding down Key [9], (remember to test your system!). Be certain to have all zones in trouble fixed quickly.
Disarming When You Return. When you enter through the exit/entry door, the sounder will come on for the entire entry period. If, upon entering, the red ARMED light is flashing, leave the premises and call authorities from a neighbor's telephone. Disarm the panel quickly, using your Arm/Disarm Code.
If an alarm occurred on a non-24-Hour Zone, the ARMED light will be flashing and the zone number will be displayed on the numerical display, even after you disarm. To reset the display, hold down Key [9].
Once the system is disarmed, the red ARMED light will go off, and the green READY light will come on (or flash if a zone is in trouble). It you enter the wrong code, you must wait 2 seconds before re-entering your code.
If an alarm occurred on a 24-Hour Zone, there will be no indication. Remember, zones that are in trouble may be displayed by holding down Key [3].
PROTECTING YOURSELF WHILE YOU ARE ON THE PREMISES
Arming With Selective Zone Bypassing. Your dealer may have chosen one or more zones that may be selectively bypassed (removed) from the system. Since a bypassed zone cannot cause an alarm, you may want to use this feature to turn off the interior areas while arming, and keep your perimeter zones (windows, doors, etc.) active.
To arm, check the green READY light to make sure that no zone is in trouble. Press the Key [B] and then the number of the zone you want to bypass. To verify which zones have been bypassed, hold down Key [2] until all zones have been displayed.
Your dealer may also have opted for interior zones to all be Group-Bypass Zones. Bypass these zones by simply pressing Key [B] twice. The yellow BYPASS light will come on whenever you bypass one or more zones. Enter your Arm/Disarm Code to arm the remaining zones. The green READY light will go off, and the red ARMED light will come on. The BYPASS light will go off when you disarm again, indicating that the bypassed zones are no longer bypassed. (Note: The BYPASS light does not come on when zones are auto-bypassed.)
Arming With Instant Protection. Pressing Key [4] (until the beep sounds) will cancel the entry delay on the Exit/Entry Zone when arming. The red ARMED light will flash rapidly to indicate this condition. If someone enters through the Exit/Entry Zone, an alarm will sound immediately.
A "Pre-Alarm Warning" may be programmed to sound at the keypad in the event that a zone has been accidentally tripped. This will alert the user that he has 10 seconds to disarm the system to avoid sounding an alarm. See PROGRAMMING.
Panic Zone. To activate the Panic Zone, simultaneously press the two keys marked [*] and [*] on the keypad. The Panic Zone may have been programmed by your installer to send a silent alarm to a central station, activate an audible alarm, or both.
THE DIGITAL COMMUNICATOR
Your installer may have programmed your security system to be monitored by a central station. The built-in digital communicator can transmit emergency signals to the central station 24 hours a day. The communicator incorporates the following features:
Abort Delay. Note which zones in your system have abort delay. This delay enables you to reset the system before a zone condition report is sent to the central station.
- Regular Burglary (Non-24-Hour) Zone reports are aborted by disarming within the delay period.
- 24-Hour Zones and zones programmed to report restores must be repaired first, then the panel armed and disarmed, all within the delay period.
Opening and Closing Reporting. An optional feature that notifies the central station every time the system is disarmed and armed.
Central Station Ringback. The central station will acknowledge the fact that you have armed your system by ringing back with a short beep from the sounder.
PROGRAMMING
The Programming Mode allows you to change your Arm/Disarm Codes and exit- and entry-delay times. It also permits you to activate or deactivate One-Button Arming (see Arming the System Before You Leave) and a 10-second Pre-Alarm Warning (see Arming With Instant Protection).
General Programming Procedure. To enter the Program Mode, first hold down Key [8] until the beep sounds then, within 5 seconds, enter your Arm/Disarm Code (the three lights will come on). In this mode of operation, the following keys perform different functions:
Key [1]: Advances the character in the display (1-9; 0; b; C; d; E; F).
Key [2]: Clears the display.
Key [3]: (Arm/Disarm Codes Only) Advances the display to the next digit of the code.
Keys [*] and [*]: Exits the Program Mode (must be pressed together).
The feature to be programmed is selected by first "dialing" its location at the keypad, according to the following table:
| Feature | Location | |
|---|---|---|
| Arm/Disarm Code | B11* | |
| Arm/Disarm Code | 2 | B12 |
| Arm/Disarm Code | 3 | B13 |
| Arm/Disarm Code | 4 | B14 |
| Feature | Location |
|---|---|
| Entry Delay Time | B15 |
| Exit Delay Time | B16 |
| One-Button Arming | B17** |
| Pre-Alarm Warning | B17** |
- * Automatically selected when the Program Mode is entered.
- **Shared location (see text).
After its location is entered, a beep at the keypad will indicate that the feature is ready for programming. The number to be programmed is determined by Key [1]. If the number displayed is wrong, press Key [2] to clear the display. Use Key [3] only to step through the digits of the Arm/Disarm Codes in order.
When the proper number is displayed at the chosen location, exit the Program Mode by pressing Keys [*] and [*] together. Arm and disarm the panel; the new program will not be memorized until you arm and disarm in succession.
Changing Arm/Disarm Codes 1-4 (Locations B11-B14). Your Arm/Disarm Codes may be up to four digits (1-9); use all four for optimum security. Caution: Do not program any zeros or letters in your Arm/Disarm Codes.
1. Hold down Key [8] until the beep sounds; then, within 5 seconds, enter your existing Arm/Disarm Code; the three lights will come on and the first digit of Arm/Disarm Code 1 will be displayed. You are now at location B11 and ready to program the first digit of your new Arm/Disarm Code 1.
Caution: If only the red light came on, you waited too long before entering your Arm/Disarm Code, and inadvertently armed the panel. Enter your code again to disarm before proceeding, then repeat Step 1.
NOTE: To program or change Arm/Disarm Code 2, 3, or 4, dial location "B12", "B13", or "B14", respectively, at the keypad, then proceed.
- 2. Select the first digit by pressing Key [1] repeatedly until the desired number is displayed. (If you pass the number, you may press Key [2] to clear the display and start again.) Do not select zeros or letters.
- 3. Press Key [3] to advance to the second digit and repeat Step 2 to program the second digit. Repeat Steps 2 and 3 until 4 digits have been programmed.
- 4. To return to the first digit of Arm/Disarm Code 1 at any time, redial location "B11". (For Codes 2, 3, or 4, redial location "B12", "B13, or B14.) To
check any Arm/Disarm Code, dial its location, then press Key [3] repeatedly to step through the code digit by digit.
5. If the code is satisfactory, exit the Program Mode: Press Keys [*] and [*] at the same time. Caution: Pressing these keys again -- after the three lights have gone out -- will signal a panic alarm!
6. Important: Arm and disarm in succession. This checks the validity of the code and, if accepted, stores it in memory as the new Arm/Disarm Code.
7. If you cannot arm, either your code has not been accepted or you entered a wrong number. Try your code again. (Remember, you must wait at least 2 seconds after entering a wrong code.) If your code is still being rejected, you may re-enter the Program Mode directly by holding down Key [8] (the three lights will come on), and reprogram that code, or a different one. Then repeat Steps 5 and 6.
Programming Entry and Exit Delays (Locations B15 and B16). Determine the amount of time that you will need to enter and disarm your system; this number will be programmed in location B15 as the Entry Delay. Similarly, determine the amount of time that you will need to arm your system and exit the premises; this number will be programmed in location B16 as the Exit Delay. Delay times are programmed in 10-second increments. Select suitable entries from the following table.
| Entry | Delay Time |
|---|---|
| 1 | 10 seconds |
| 2 | 20 seconds |
| 3 | 30 seconds |
| 4 | 40 seconds |
| 5 | 50 seconds |
| Entry | Delay Time |
|---|---|
| 6 | 60 seconds |
| 7 | 70 seconds |
| 8 | 80 seconds |
| 9 | 90 seconds |
| 0 | 100 seconds |
| Entry | Delay Time |
|---|---|
| b | 110 seconds |
| C . | 120 seconds |
| d | 130 seconds |
| E | 140 seconds |
| F | 150 seconds |
To program Entry and Exit Delays, proceed as follows:
1. Hold down Key [8] until the beep sounds.
2. Within 5 seconds enter your Arm/Disarm Code. The three lights will come on and the display will show the first digit of your code.
Caution: If only the red light comes on, you waited too long before entering your Arm/Disarm Code, and armed the panel. Enter your code again to disarm before proceeding.
- 3. Dial location "B15"; a beep will sound. Press Key [1] repeatedly until the Entry Delay value (chosen from the table) appears in the display.
- 4. Dial location "B16"; a beep will sound. As above, press Key [1] repeatedly until the Exit Delay value (chosen from the table) appears in the display.
- 5. Check either delay time by dialing its respective location. If the delays are satisfactory, exit the Program Mode: Press Keys [*] and [*] together.
- 6. Arm and Disarm the system. (If you cannot arm, see Changing Arm/Disarm Codes 1-4, Step 7.)
Programming One-Button Arming and Pre-Alarm Warning (Location B17). These two features share a common location (B17). Program as follows:
- 1. Hold down Key [8] until the beep sounds, enter your Arm/Disarm Code within 5 seconds, then dial location "B17".
- 2. Use Key [1] to select the entry for location B17:
| Enter | To Program |
|---|---|
| "1" | One-Button Arming only |
| "2" | Pre-Alarm Warning only |
| _"3" | Both One-Button Arming and Pre-Alarm Warning |
3. Press Keys [*] and [*] simultaneously to exit the Program Mode, then arm and disarm. (If you cannot arm, see Changing Arm/Disarm Codes 1-4, Step 7.)
If a Digital Communicator is Connected to a Telephone Line:
Do not notify the telephone company. It is no longer necessary to call the telephone company to notify it of the registration and ringer equivalence numbers of any telephone instrument being connected to the public switched telephone network. The telephone company will call and request this information if a need arises in the future.
Ringer Equivalence Number.
The FCC Registration Label, found on top of your system and on the bottom of your telephone sets, includes the ringer equivalence number (REN). This is a representation of the electrical load that will be applied to your telephone line. This system has a ringer equivalence of zero. Therefore, it does not affect the load of the telephone company central office equipment when your telephones ring. The telephone line servicing your premises will not operate properly if the total ringer load exceeds the capability of the central office equipment. That is, if too many ringers are connected to the line, there may be insufficient energy to ring your telephones. If the ringer load is excessive, you may also have difficulty dialing telephone numbers.
If you want to know the total REN allowed for your telephone line, you may call your telephone company. However, as a rule of thumb, a total REN of five (5) should permit normal operation of your telephone sets and equipment. To determine the total ringer load, list the REN of each of your telephone sets or devices connected to your telephone line. Add these numbers; the result is the total REN for your line. If this number exceeds 5, you may want to consult your telephone company to determine whether or not proper operation of your equipment is possible.
Rights of the Telephone Company
If your digital communicator causes harm to the telephone network, the telephone company may discontinue your service temporarily. If possible, they will notify you in advance. But if advance notice is not practical, you will be notified as soon as possible. You will be given the opportunity to correct the situation and you will be informed of your right to file a complaint with the FCC.
Your telephone company may make changes in its facilities, equipment, operations or procedures that could affect the proper function of your communicator. If they do, you will be notified in advance to give you an opportunity to maintain uninterrupted service.
The following statement is required by the Federal Communications Commission.
This equipment generates and uses radio-frequency energy and, if not installed and used properly, that is, in strict accordance with the manufacturer's instructions, may cause interference to radio and television reception. It has been type tested and found to comply with the limits for a Class-B computing device in accordance with the specifications in Subpart J of Part 15 of FCC Rules, which are designed to provide reasonable protection against such interference in a residential installation.
However, there is no guarantee that interference will not occur in a particular installation. If this equipment does cause interference to radio or television reception, which can be determined by turning the equipment off and on, the user is encouraged to try to correct the interference by one or more of the following measures: reorient the receiving antenna; relocate the computer with respect to the receiver; move the computer away from the receiver; plug the computer into a different outlet so that computer and receiver are on different branch circuits.
If necessary, the user should consult the dealer or an experienced radio/television technician for additional suggestions. The user may find the following booklet prepared by the Federal Communications Commission helpful: "How to Identify and Resolve Radio-TV Interference Problems." This booklet is available from the U.S. Government Printing Office, Washington, DC 20402; Stock No. 004-000-00345-4.
ALARM LOCK LIMITED WARRANTY
ALARM LOCK SYSTEMS, INC. warrants each of its products to be free from manufacturing defects in materials and workmanship for fifteen months following the date of manufacture. ALARM LOCK will, within said period, at its option, repair or replace any product failing to operate correctly, without charge to the original purchaser or user.
This warranty shall not apply to any equipment or any part thereof which has been repaired by others, improperly installed, improperly used, abused, altered, damaged, subjected to accident, nuisance, flood, fire or acts of God, or on which any serial numbers have been altered, defaced or removed. Seller will not be responsible for any dismantling, reassembly or reinstallation charges.
In order to exercise the warranty, the product must be returned by the user or purchaser, shipping costs prepaid, and insured to ALARM LOCK. After repair or replacement, ALARM LOCK assumes the cost of returning products under warranty.
There are no warranties, express or implied which extend beyond the description on the face hereof. There is no express or implied warranty of merchantability or a warranty of fitness for a particular purpose. Additionally, this warranty is in lieu of all other obligations or liabilities on the part of ALARM LOCK.
This warranty contains the entire warranty. It is the sole warranty and any prior agreements or
representations, whether oral or written, are either merged herein or are expressly cancelled. ALARM LOCK neither assumes, nor authorizes any other person purporting to act on its behalf to modify, to change, nor to assume for it, any other warranty or liability concerning its products.
In no event shall ALARM LOCK be liable for an amount in excess of ALARM LOCK's original selling price of the product, for any commercial loss or damage, whether direct, indirect, incidental, consequential, or otherwise arising out of any failure of the product. Seller's warranty, as hereinabove set forth, shall not be enlarged, diminished or affected by and no obligation or liability shall arise or grow out of Seller's rendering of technical advice or service in connection with Buyer's order of the goods furnished hereunder.
ALARM LOCK recommends that the entire system be completely tested weekly.
Warning: Despite frequent testing, and due to, but not limited to, any or all of the following; criminal tampering, electrical or communications disruption, it is possible for the system to fail to perform as expected. Therefore, the consumer is advised to take any and all precautions for his or her safety including, but not limited to, fleeing the premises and calling police or fire department, in order to mitigate the possibilities of harm and/or damage.
This warranty shall be construed in accordance with the laws of the State of New Jersey.
Dependable. Inside and out.